Installing Visual Studio Express C++
Downloading & Installing Visual Studio C++ Express Edition:
NB Platform SDK is required only for MSVC EXPRESS 2005 ... not Express 2008 or Express 2010
- Go to http://www.microsoft.com/express/download/
- Scroll down the web page till you see 6 different downloads e.g. Visual Basic, SQL Server and Visual C++.
- Select your language for Visual C++ Express Edition, as soon as you select your language a "File download" window will pop up, click Run.
- There should be a bit of loading, once finished click Run and again.
- There should be a minute or two of loading, click Next in the Visual Studio C++ set-up.
- Accept the terms and click Yes.
- Tick the Graphical IDE if it hasn't been ticked already and click Next.
- Browse for a location in where you would like Visual Studio C++ (although, it would be best to keep the default location in case something need to find the Visual Studio C++ folder and cannot find it in its default location) then click Next.
- If you have any minor jobs to do, I suggest you do so now as it will take a while, but keep checking on how the installation is coming.
- Then reboot your computer.
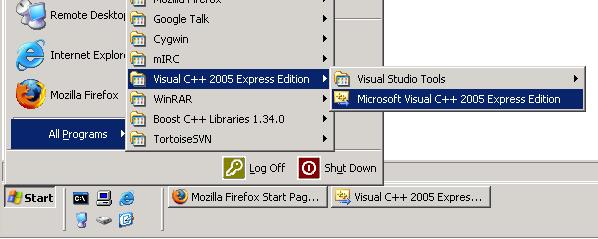
- Once your pc is ready look for Visual Studio C++ on icon your desktop, if its not there go to start, all programs in the start menu and look for Visual Studio C++ Edition as shown in the example:
- The window below will pop up, telling you that you need to register your copy of Visual Studio C++ Express Edition.


Downloading & Installing Platform SDK:
- Go to http://www.microsoft.com/downloads/details.aspx?familyid=0baf2b35-c656-4969-ace8-e4c0c0716adb&displaylang=en. The page is titled: "Microsoft ® Windows Server® 2003 R2 Platform SDK Web Install"
- Click on the Continue button.
- Depending on your internet browser, you might have to install a plug-in. IF not, scroll down the web page and click on the Continue button.
- Click on the link called "Download Files Below" or you can just find the subheading Files in this Download
- There will be list of different types of files, depending on your processor to download.
- If you have a 64 bit Intel processor download PSDK-ia64.exe
- If you have a 64 bit AMD processor download PSDK-amd64.exe
- If you have another processor type, and it's listed on the web site but not here choose that Download.
- If you have another processor type which is not included in the list on the web page download PSDK-x86.exe
Extra: If your on a virtual computer, then check the version on windows you are using.
- Save the file into your download folder.
- Then click Run, Then click Run again.
- At the next window, with two button, click Cancel.
- Click Next.
- Agree to the terms, and click Next.
- Do a custom installation, and click Next.
- You come to a stage in the set-up where it asks "In which driver do you want to save you files to?". Pick the drive you prefer. To change from drive to drive you change the beginning of the location. So if you want to save SDK in the C drive, leave it as it is and if you want to save SDK to the D drive, change C to D. Or click browse. Then click Next.
- Click Next again, and wait for the loading.
- Then continue the download, till the end.
Update the corewin_express.vsprops file.
One more step is needed to make the Win32 template work in Visual C++ Express. You need to edit the corewin_express.vsprops file - *NOT* the CoreWin.vsprops file (found in C:\Program Files\Microsoft Visual Studio 8\VC\VCProjectDefaults) - and
Change the string that reads:
AdditionalDependencies="kernel32.lib"
to
AdditionalDependencies="kernel32.lib user32.lib gdi32.lib winspool.lib comdlg32.lib advapi32.lib shell32.lib ole32.lib oleaut32.lib uuid.lib"
Update Paths in VS prior to VS2010
- Go to Tools, Options, open Project and Solutions and go to VC++ Directoies
- Your window should look like this:

- Do the following:
- Click the drop down menu for Show directories for: and click Include Files, now click the button that looks like a yellow folder and in the field were the cursor is blinking copy an paste the following path, and then press Enter: C:\Program Files\Microsoft Platform SDK for Windows Server 2003 R2\Bin
- Click the drop down menu for Show directories for: and click Include Files, now click the button that looks like a yellow folder and in the field were the cursor is blinking copy an paste the following path, and then press Enter: C:\Program Files\Microsoft Platform SDK for Windows Server 2003 R2\Include
- Click the drop down menu for Show directories for: and click Library files, now click the button that looks like a yellow folder and in the field were the cursor is blinking copy an paste the following path, and then press Enter: C:\Program Files\Microsoft Platform SDK for Windows Server 2003 R2\Lib
- Click the drop down menu for Show directories for: and click Include Files, now click the button that looks like a yellow folder and in the field were the cursor is blinking copy and paste the path to the boost_1_34_0 folder you created earlier when installing the Boost libraries.
- Click the drop down menu for Show directories for: and click Library Files, now click the button that looks like a yellow folder in the field were the cursor is blinking copy and paste the path to the boost_1_34_0\lib folder you created earlier when installing the Boost libraries.

Update Paths in VS2010
TODO:as Platform SDK is not used, clean following from unnessesary paths
VC++ Directories are no longer supported in VS2010 through Tools->Options page. Instead, VS2010 introduces the user settings file (Microsoft.cpp.<Platform>.users.props) to control global settings including Global search path. These files are located at $(USERPROFILE)\appdata\local\microsoft\msbuild\v4.0 directory. Upon migration to VS2010, the custom settings of VC++ Directories from VS2005 or VS2008 are migrated to these user files. These global settings files are imported into all the converted and newly created projects.
- Switch VS2010 IDE to "Expert" setting (default is "Basic" after the installation): Tools -> Settings -> Expert Settings
- Load any project or solution
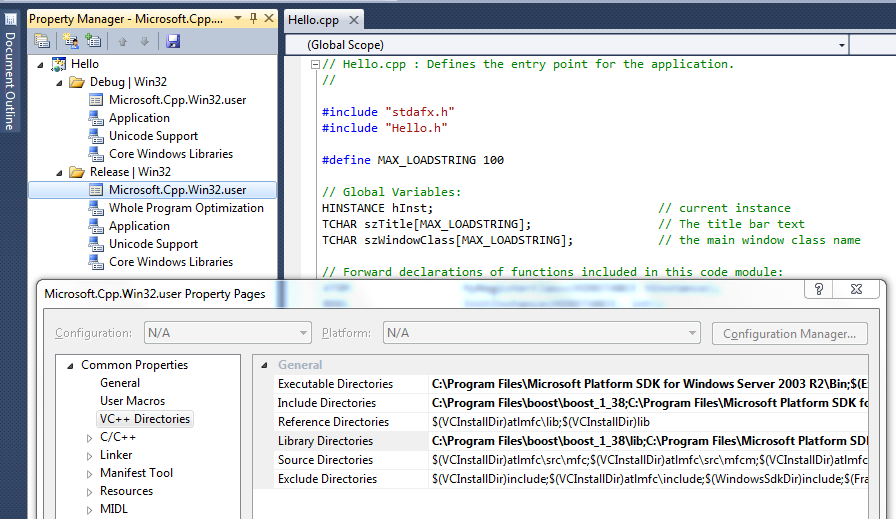
- Open "Properties Manager" dialog: View -> Property Manager
- Expand all branches, you should see Microsoft.Cpp.Win32.user leaves
- Double Click "Microsoft.Cpp.Win32.user" leaf, and Microsoft.Cpp.Win32.user Property Page Dialog is opened
- Do the following:
- Click the value of Executable Directories, then small Down button to the right, <Edit...>, now click the button that looks like a yellow folder and in the field were the cursor is blinking copy an paste the following path, and then press Enter: C:\Program Files\Microsoft Platform SDK for Windows Server 2003 R2\Bin
- Click the value of Include Directories, then small Down button to the right, <Edit...>, now click the button that looks like a yellow folder and in the field were the cursor is blinking copy an paste the following path, and then press Enter: C:\Program Files\Microsoft Platform SDK for Windows Server 2003 R2\Include
- Click the value of Library Directories, then small Down button to the right, <Edit...>, now click the button that looks like a yellow folder and in the field were the cursor is blinking copy an paste the following path, and then press Enter: C:\Program Files\Microsoft Platform SDK for Windows Server 2003 R2\Lib
- Click the value of Include Directories, then small Down button to the right, <Edit...>, now click the button that looks like a yellow folder and in the field were the cursor is blinking copy and paste the path to the boost_1_38_0 folder you created earlier when installing the Boost libraries.
- Click the value of Include Directories, then small Down button to the right, <Edit...>, now click the button that looks like a yellow folder in the field were the cursor is blinking copy and paste the path to the boost_1_38_0\lib folder you created earlier when installing the Boost libraries.
- Your window should look like this:

All the paths updated will be saved in "C:\Documents and Settings\<user>\AppData\Local\Microsoft\MSBuild\v4.0\Microsoft.Cpp.Win32.user.props".
Generate and build a Win32 application to test your paths.
In Visual C++ Express, the Win32 Windows Application type is disabled in the Win32 Application Wizard. To enable that type, you need to edit the file AppSettings.htm file located in the folder %ProgramFiles%\Microsoft Visual Studio 8\VC\VCWizards\AppWiz\Generic\Application\html\1033\".
In a text editor comment out lines 441 - 444 by putting a // in front of them as shown here:
// WIN_APP.disabled = true;
// WIN_APP_LABEL.disabled = true;
// DLL_APP.disabled = true;
// DLL_APP_LABEL.disabled = true;
Save and close the file and open Visual C++ Express.
From the File menu, click New Project. In the New Project dialog box, expand the Visual C++ node in the Product Types tree and then click Win32. Click on the Win32 Console Application template and then give your project a name and click OK. In the Win32 Application Wizard dialog box, make sure that Windows application is selected as the Application type and the ATL is not selected. Click the Finish button to generate the project.
Compile by pressing F5.
Win32 application should build and run.